


Introduction
Docker is an amazing tool, but typing commands into a black terminal can be overwhelming for beginners. Enter Portainer - a graphical user interface (GUI) dashboard that lets you click your way through Docker straight from your web browser.
In this step-by-step tutorial, we will show you how to install Portainer on your server in just a few minutes. You don't need to be a Linux expert - just copy and paste the commands below!
Prerequisites: You will need a Premium VPS running Ubuntu or Debian and an SSH client (e.g. PuTTY or your system Terminal). If you don't have a server yet, VoxiHost offers Premium VPS and Budget VPS with Ubuntu and Debian available out of the box.
Step 1: Connect to your Server and Install Docker
First, connect to your server via SSH. Next, let's make sure Docker is installed. If you don't have it yet, simply paste this one-line installer command which will do all the heavy lifting for you:
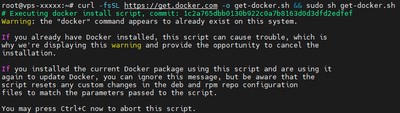
curl -fsSL https://get.docker.com -o get-docker.sh && sudo sh get-docker.sh
Wait a few moments for the installation to finish.
Step 2: Prepare Storage for Portainer
Portainer needs a safe place on your hard drive to save your passwords and configurations. Paste the following command into your terminal and press ENTER to create a "volume":

docker volume create portainer_data
Step 3: Run Portainer
Now we will start Portainer itself. The command below will download the latest version and run it in the background. Paste the entire command into the terminal and press ENTER:

docker run -d -p 8000:8000 -p 9443:9443 --name portainer --restart=always -v /var/run/docker.sock:/var/run/docker.sock -v portainer_data:/data portainer/portainer-ce:latest
That's it! The installation on the server side is complete.
Step 4: First Login in the Browser
You can now close your terminal. Open your favorite web browser (like Chrome or Firefox) and type the following into the address bar:
https://YOUR_SERVER_IP:9443
(Replace "YOUR_SERVER_IP" with the actual IP address of your VPS, e.g., https://192.168.1.50:9443)
Tip: If you see the error
Client sent an HTTP request to an HTTPS server., it means your browser tried to connect via standard HTTP. Make sure your address explicitly starts with https://.
Important: Your browser might show a "Your connection is not private" warning. This is completely normal because the server uses a self-signed certificate by default. Simply click "Advanced" and then "Proceed / Continue".
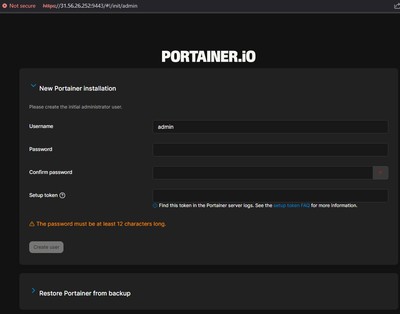
You will see the initial setup screen. Create a strong password for yourself, type it twice, and click the Create user button.
Important (5-minute limit!): Portainer takes security seriously. If more than 5 minutes pass between starting the container (Step 3) and setting your password, the setup will time out. To unlock it, go to your terminal and type
docker restart portainer, then refresh the page. You will then be asked for a Setup Token. To get it, typedocker logs portainer. Near the bottom of the logs, you will see Use the following token to setup the administrator user: followed by a long code. Copy this token and paste it into the browser.
Step 5: Managing Containers
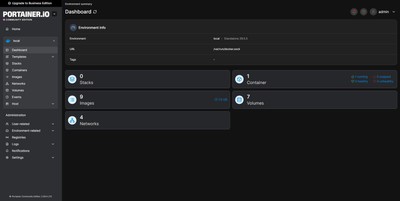
After logging in, click the "Get Started" button, and on the next screen, click the whale icon labeled "Local" (which represents the server we are currently on).
You're all set! You now have access to the full dashboard. From now on, you don't need to use terminal commands - you can manage your apps using your mouse.
Conclusion
Portainer is an incredible tool that makes Docker accessible even for those without much Linux experience. If you are looking for a server to run your own projects, VoxiHost offers Premium VPS and Budget VPS with Ubuntu and Debian ready to go.