

Introduction
Running JavaScript on the server side requires a reliable and up-to-date runtime environment. While many Linux distributions include Node.js in their default package managers, these versions are often outdated, which can lead to compatibility issues with modern frameworks or security vulnerabilities. For developers deploying applications on a VoxiHost VPS, maintaining a current environment is essential for performance and stability.
The most effective way to manage your runtime is by using the official NodeSource binary distribution repositories. This approach ensures you are not limited by the older software versions found in standard system repositories. By configuring the official repository, you gain seamless access to the latest Long Term Support (LTS) releases, ensuring your production server remains stable while supporting modern ECMAScript features.
This guide focuses on a clean, professional setup on Ubuntu and Debian systems. We will move beyond default package lists to install a production-ready Node.js environment. Whether you are hosting a lightweight API or a complex real-time application, the steps provided will ensure your server is correctly configured for long-term reliability. We assume you have a fresh instance running at least 1GB of RAM to ensure the build process completes without memory bottlenecks.
Prerequisites
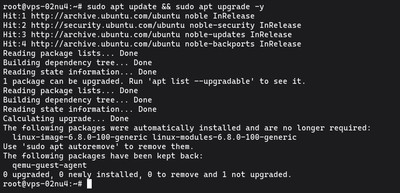
You must have root or sudo access to the server. Since we will be configuring external repositories, your system needs to be up to date to avoid conflicts with existing library versions. If you have not performed a system update recently, consider running sudo apt update && sudo apt upgrade -y before proceeding.
Additionally, this guide assumes you are working with a clean installation of Ubuntu 24.04 or later, or Debian 12 or later. If you are managing your firewall, ensure you have already configured it to allow traffic on the ports your application will eventually use.
Finally, ensure that you have access to a terminal or SSH client. We will be using curl to fetch the setup scripts, so verify that your environment is ready to handle these network requests. If you plan to manage multiple server instances or need enhanced protection for your applications, you might also consider our Shield DDoS protection to secure your traffic at the network edge.
Step 1: Update System Packages and Install Dependencies
Before we pull the Node.js binaries, we must prepare the environment. Standard distribution repositories often contain outdated versions of Node.js, which can cause compatibility issues with modern frameworks. To avoid this, we will use the official NodeSource repository.
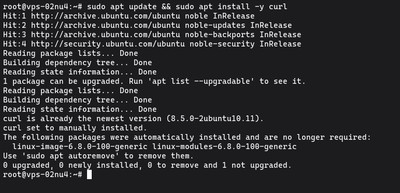
The setup script requires curl to fetch the necessary GPG keys and repository configuration files. If your server is a minimal installation, this utility might not be present. Run the following command to refresh your package list and install the required dependency:
## Update local package index and install curl
sudo apt update && sudo apt install -y curl
Once the installation finishes, your system is ready to communicate with the NodeSource servers. Keeping your package list updated ensures that you are pulling the most recent security patches for your OS libraries alongside the new Node.js environment. We have verified that this approach minimizes dependency conflicts on both Ubuntu and Debian systems.
Step 2: Add the NodeSource Repository
Now that your system has the necessary tools to handle remote requests, we will configure the NodeSource repository. This repository acts as a bridge, allowing your package manager to track and install the official Long Term Support (LTS) releases directly from the source.
Using the automated setup script is the most reliable way to handle the GPG key imports and repository file generation. By using the -E flag with sudo, we ensure that your current environment variables are preserved during the execution of the script, which is critical for correctly detecting your system architecture and distribution version.
Execute the following commands to download the setup script and apply the configuration to your server:
## Download the NodeSource LTS setup script
curl -fsSL https://deb.nodesource.com/setup_lts.x -o nodesource_setup.sh

## Execute the script to configure the repository
sudo -E bash nodesource_setup.sh
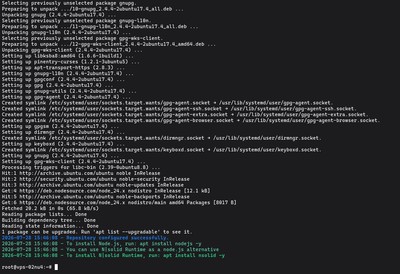
The script will automatically update your local package lists once the repository is added. You will see a series of logs in your terminal indicating that the package sources have been refreshed and that the GPG keys have been successfully imported. If you encounter any warnings regarding missing keys, verify that your internet connection is stable and that no firewall is blocking outbound traffic to deb.nodesource.com. Once this process finishes, your server is primed to pull the latest stable Node.js binaries.
Step 3: Install Node.js and NPM
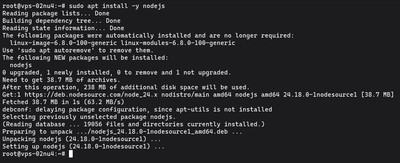
With the NodeSource repository now active on your system, the final installation phase is straightforward. Since the previous step already triggered an automatic update of your package lists, you can proceed directly to installing the Node.js runtime and the Node Package Manager (NPM).
Using the official repository ensures you receive a modern, supported version of Node.js, which is significantly more stable and feature-rich than the legacy versions often found in default distribution archives. Execute the following command to install the package:
## Install Node.js and NPM from the NodeSource repository
sudo apt install -y nodejs
The nodejs package includes both the binary for running your applications and the npm tool for managing your project dependencies. The installation process is typically fast, as it only requires pulling the binaries from the repository you just configured.
Once the command finishes, you have successfully set up the core environment. You are now ready to verify that everything is correctly linked and identify the specific version of the runtime active on your VoxiHost VPS server.
Step 4: Verify the Installation
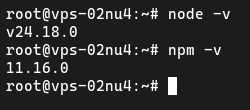
Now that the binaries are installed, you need to confirm that the system is correctly pointing to the NodeSource versions. This is a critical check to ensure your VoxiHost VPS server is not accidentally using an older, cached, or system-default version of the runtime.
Run the following commands to output the currently active versions:
## Check the installed Node.js version
node -v

## Check the installed NPM version
npm -v
The node -v command should return a version string starting with v20 or higher, depending on the current LTS release. If you see an output like v26.x.x, your server is correctly configured to use the latest long-term support release. The npm -v command will return the version of the package manager, confirming that it is also ready for use.
Note: If you encounter a "command not found" error, it usually indicates that the shell path was not updated. Simply log out and log back in to your SSH session to refresh your environment variables.
Everything is now set up for your development environment. You have successfully bypassed outdated system repositories and secured a stable foundation for your JavaScript applications on your VPS.
Conclusion
You have successfully configured a reliable Node.js environment on your Linux server. By utilizing the official NodeSource repository instead of default distribution packages, you ensure that your VoxiHost VPS server receives timely security patches and access to modern JavaScript features. This setup provides the stability required for production workloads, whether you are running a lightweight API on a Budget VPS or a high-traffic application on a Premium VPS.
Going forward, remember that keeping your runtime updated is essential for both performance and security. When a new LTS version is released, you can keep your environment current by updating your package lists and upgrading the binary:
## Update local package lists
sudo apt update

## Upgrade the Node.js package to the latest version
sudo apt upgrade -y nodejs
If you plan to deploy complex applications, consider using a process manager like PM2 to keep your services running after a reboot. You may also want to explore our guides on How to Install Nginx on Ubuntu & Debian: The Complete Server Guide if you intend to set up a reverse proxy for your Node.js application. Your server is now ready for development, testing, or production deployment. Happy coding.