When you rent a brand new Linux VPS, you are usually greeted with a terrifying black terminal screen.
While you can technically upload files directly through the command line using scp or rsync, dragging and dropping your website's folder using a visual interface is infinitely easier, especially for beginners.
The absolute best way to do this is using SFTP (Secure File Transfer Protocol) with a free desktop client called FileZilla.
Important Note: Do not confuse standard FTP with SFTP. Standard FTP sends your passwords and files over the internet in plain, unencrypted text. SFTP routes all FTP commands through your server's secure SSH tunnel. Because of this, you do not need to install an FTP server like vsftpd on your Linux VPS. If you have an SSH connection, SFTP will work automatically!
Step 1: Download FileZilla
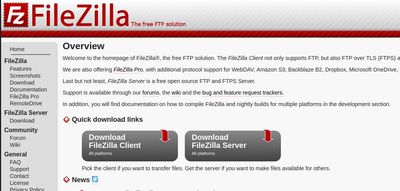
If you haven't already, download the FileZilla Client (not the Server version) from the official FileZilla website. It is completely free and available for Windows, macOS, and Linux.
Step 2: Configure the Site Manager
Do not use the "Quickconnect" bar at the very top of the application. It does not securely save your SSH keys or complex server settings.
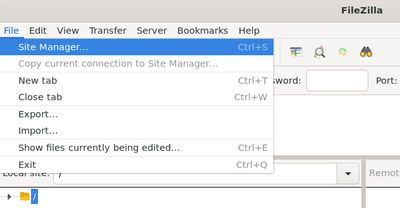
Instead, open the Site Manager. You can find it by clicking the very first icon on the top-left toolbar, or by navigating to File > Site Manager (or CTRL + S on Windows).
- Click New Site.
- Name the site something recognizable, like "My VPS Web Server".
Step 3: Select the SFTP Protocol
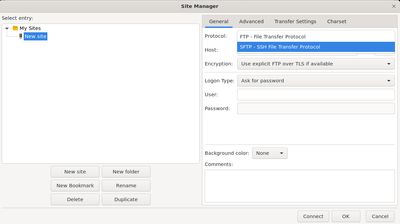
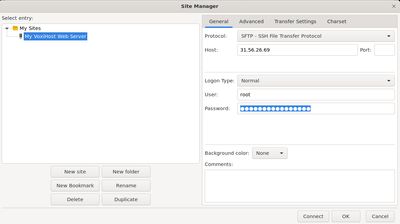
Look at the right side of the Site Manager window. Under the Protocol dropdown, it defaults to standard FTP.
You must change this. Click the dropdown and select:
SFTP - SSH File Transfer Protocol
If you skip this step, FileZilla will constantly fail to connect to your server securely.
Step 4: Add Your Credentials or SSH Key
Now you need to tell FileZilla where to go and how to log in.
- Host: Enter your server's public IP address (e.g.,
192.168.1.100). - Port: Leave this blank unless you have manually changed your SSH port.
- Logon Type: This is where most beginners get stuck. Change this to
Key fileif you use SSH keys, orNormalif you use a password. - User: Enter your username (usually
rootfor a fresh server deployment). - Key file: Click Browse and select the private key file on your computer.
If you use a Password:
While we highly discourage using passwords for server access (as they are vulnerable to brute-force attacks), if you must:
- Set the Logon Type to Normal.
- User: Type
root(or whatever user account you created). - Password: Enter your standard SSH password.
If you use SSH Keys (Recommended):
If you generated an SSH key pair (like id_rsa or id_ed25519) to log into your server securely without a password:
- Set the Logon Type to Key file.
- User: Type your username (like
rootoradmin). - Click the Browse button and locate the
private keyfile on your desktop (not the one ending in.pub).
(If FileZilla asks for a password during the connection, it is asking for the passphrase you put on your private key, not the server's root password).
Step 5: Connect and Transfer
Click the Connect button at the bottom of the window.
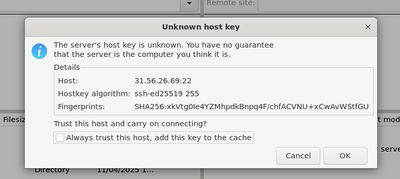
The very first time you connect to the server from this computer, a scary-looking window will pop up titled "Unknown host key". This is a standard security measure preventing "Man in the Middle" attacks.
Check the box that says "Always trust this host..." and click OK.
The FileZilla Interface

If your credentials are correct, you will successfully connect. You are now looking at two massive split windows:
- Left Side: Your local computer (your hard drive).
- Right Side: Your Linux VPS (the remote server).
To transfer files, simply drag and drop them from the left window to the right window.
A common place to upload web files is:
/var/www/html/
Navigate there in the right-side window, drag your index.html from your desktop (left side) to that folder, and your website is live!
If you don't have a server to practice on, Budget VPS plans from VoxiHost are a perfect, affordable playground to learn how to manage Linux without breaking the bank. You can deploy a clean instance in seconds and start transferring files immediately.