The LEMP stack is the modern, high-performance foundation for millions of websites worldwide. It is an acronym representing the four critical pieces of software required to host dynamic, database-driven applications (like WordPress or Laravel):
- Linux: The operating system (Ubuntu or Debian).
- ENginx (pronounced Engine-X): The lightning-fast web server.
- MariaDB: The community-driven, drop-in replacement for MySQL.
- PHP: The backend processing language.
Compared to the older LAMP (Apache) stack, LEMP is highly favored for environments handling heavy, concurrent traffic because of Nginx's asynchronous architecture.
Step 1: Install Nginx (The Web Server)
First, update your package index to ensure you are downloading the latest software versions.
sudo apt update
sudo apt upgrade -y
Install Nginx:
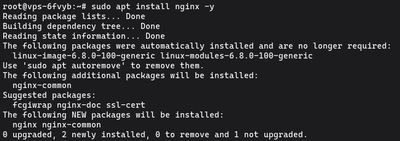
sudo apt install nginx -y
If you followed our UFW Firewall Guide, you need to allow Nginx traffic through the firewall. Open both HTTP (Port 80) and HTTPS (Port 443):
sudo ufw allow 'Nginx Full'
You can verify Nginx is running by typing your server's public IP address into your web browser. You should see the standard "Welcome to nginx!" page.
Step 2: Install MariaDB (The Database)
Now that you have a web server, you need a database system to store and manage your application's data. MariaDB is a highly optimized, fully open-source fork of MySQL that is standard on modern Linux distributions.
Install the MariaDB server:
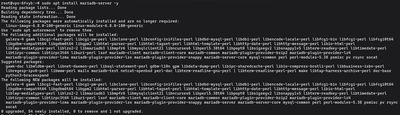
sudo apt install mariadb-server -y
Once installed, the database is active but completely unsecured. You need to lock it down using the built-in security script.
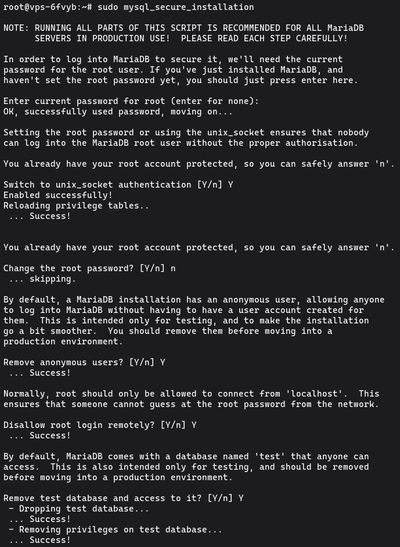
sudo mysql_secure_installation
You will be asked a series of prompts:
- Current root password: Press
Enter(there is no password yet). - Switch to unix_socket authentication: Type
Y. - Change the root password: Type
N(modern MariaDB secures the root user dynamically using your Linuxsudoprivileges). - Remove anonymous users: Type
Y. - Disallow root login remotely: Type
Y. - Remove test database: Type
Y. - Reload privilege tables: Type
Y.
Your database is now locked down and ready.
Step 3: Install PHP (The Processing Language)
Nginx is incredibly fast at serving static files (HTML, images, CSS), but it cannot process dynamic PHP code natively the way Apache can.
To process PHP, we must install PHP-FPM (FastCGI Process Manager). Nginx will pass all .php files it receives directly to this background processor. You also need the php-mysql package so PHP can talk to your MariaDB database.
Install both packages:
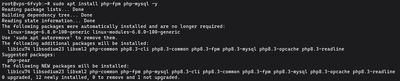
sudo apt install php-fpm php-mysql -y
Note: Depending on your exact Debian/Ubuntu version, apt will automatically install the correct PHP version (e.g., php8.1-fpm or php8.3-fpm). Make a mental note of which version it installs, as you'll need it in the next step.
Step 4: Configure Nginx to use PHP
We need to explicitly tell Nginx how to handle PHP files.
Let's assume you are configuring the default Nginx Server Block. Open the default configuration file in nano:
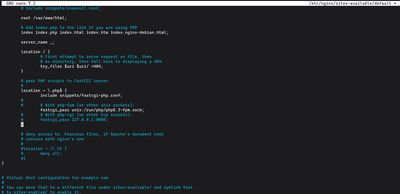
sudo nano /etc/nginx/sites-available/default
Look for the index directive. You need to add index.php to the very beginning of the list, telling Nginx to prioritize PHP files over standard HTML files.
# Add index.php before index.html
index index.php index.html index.htm index.nginx-debian.html;
Next, scroll down to the location ~ \.php$ block. Uncomment (remove the # symbol) from the relevant lines so it looks exactly like this. Make sure the phpX.X-fpm.sock matches the version you installed in Step 3!
location ~ \.php$ {
    include snippets/fastcgi-php.conf;
    fastcgi_pass unix:/var/run/php/php8.3-fpm.sock;
}
Save the file and exit nano.
Test your Nginx configuration for syntax errors:

sudo nginx -t
If it reports syntax is ok, reload Nginx to apply the changes:
sudo systemctl reload nginx
Step 5: Test PHP Processing on Nginx
To prove that Nginx is successfully handing off code to PHP-FPM, we will create a classic PHP info script.
Create a new file in your web root directory:

sudo nano /var/www/html/info.php
Paste the following PHP code:
<?php
phpinfo();
?>
Save and exit.
Open your browser and navigate to: http://your_server_ip/info.php
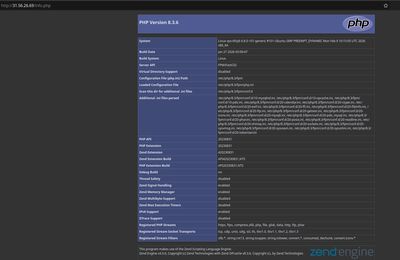
You should see a massive, detailed purple and gray table outlining your server's exact PHP configuration and modules. This proves your complete LEMP stack is functioning perfectly!
Crucial Warning: Delete this file immediately. Leaving it publicly accessible exposes extremely sensitive information about your server's configuration to hackers.
sudo rm /var/www/html/info.php
Your server is now a fully powered production machine. Ready to host millions of hits? Deploy an intensely fast Premium VPS, install your LEMP stack, get a free Let's Encrypt SSL, and launch your database-driven application directly to the world.