Docker Engine is fantastic for running single, isolated containers. But modern applications rarely exist in total isolation. You usually have a web server, a backend API, a database (like MySQL or PostgreSQL), and maybe a caching layer (like Redis).
Trying to start all of those containers manually and manually linking their internal networking together via exhausting, mile-long docker run commands is frustrating and severely prone to human error.
Enter Docker Compose. It allows you to declare your entire application stack in a single, clean .yml (YAML) configuration file. With one central command, Docker builds the internal networks, pulls all necessary images, and launches the entire stack sequentially.
Step 1: Verify Docker Compose is Installed
If you followed our Docker installation guides for Ubuntu/Debian or AlmaLinux/Rocky/Fedora, you actually already have Docker Compose installed!
Modern Docker distributions have shifted away from the old standalone docker-compose binary (written in Python) to a native Docker Compose V2 Plugin (written in Go) embedded directly into the Docker CLI.
Verify it is installed by checking its version:

docker compose version
(Notice there is a space between docker and compose, not a hyphen!)
You should see an output like:
Docker Compose version v2.32.x
If you receive a "command not found" error, you need to install the plugin via your package manager:
- Ubuntu/Debian:
sudo apt install docker-compose-plugin - AlmaLinux/RHEL:
sudo dnf install docker-compose-plugin
Step 2: Set Up a Project Directory
Docker Compose relies absolutely on the context of the directory you run the command in. It looks for a file named docker-compose.yml in whatever folder you are currently inside.
First, let's make a dedicated home for your new project so files stay organized:

mkdir my-webapp
cd my-webapp
Step 3: Create the docker-compose.yml File
Now, let's create a functional, real-world example. We are going to deploy the official WordPress image and attach it to a secure MySQL database backend, cleanly configuring everything through Compose.
Open a new file with nano:
nano docker-compose.yml
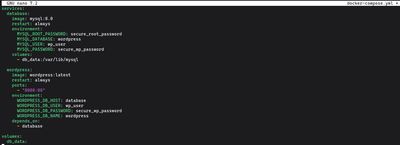
Paste the following YAML block entirely:
services:
  database:
    image: mysql:8.0
    restart: always
    environment:
      MYSQL_ROOT_PASSWORD: secure_root_password
      MYSQL_DATABASE: wordpress
      MYSQL_USER: wp_user
      MYSQL_PASSWORD: secure_wp_password
    volumes:
      - db_data:/var/lib/mysql

  wordpress:
    image: wordpress:latest
    restart: always
    ports:
      - "8080:80"
    environment:
      WORDPRESS_DB_HOST: database
      WORDPRESS_DB_USER: wp_user
      WORDPRESS_DB_PASSWORD: secure_wp_password
      WORDPRESS_DB_NAME: wordpress
    depends_on:
      - database

volumes:
  db_data:
Breaking Down the Configuration:
- services: We defined two containers:
databaseandwordpress. - image: Tells Docker which container template to pull from Docker Hub.
- environment: Injects secure variables (like passwords and usernames) automatically into the containers so they configure themselves silently on first boot. Look at how the
wordpresscontainer knows its host isdatabase(the exact name of the other service). Docker Compose automatically built an internal, invisible network for them to talk to each other seamlessly! - ports: Maps port
8080on the public internet directly to port80(Standard HTTP) inside the internal isolated WordPress container. - volumes: In standard containers, when you delete a container, all the data goes with it. We mapped the database storage to a hard drive volume so your data persists even if you restart or delete the container!
- depends_on: Ensures WordPress does not attempt to boot up until the database is successfully running.
Save and exit.
Step 4: Spin it Up
With one file, your entire infrastructure is declared. To launch it, run the up command. The -d flag tells it to run "detached" in the background so you can keep using your terminal console:
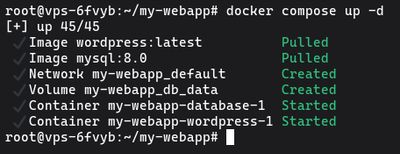
docker compose up -d
Docker will automatically:
- Create a dedicated internal network for
my-webapp. - Pull the heavy MySQL and WordPress images.
- Start the database, assign the passwords, and build the persistent storage partition.
- Start the WordPress server, attach it to the network, and map port 8080.
Once finished, open your web browser and navigate to your server's IP address combined with port 8080:
http://your_server_ip:8080
[!CAUTION]
Security Warning: Docker manages its own network rules throughiptables. When you use aports:mapping in yourdocker-compose.ymlfile, Docker will bypass your UFW firewall completely. To keep a service private, map it to127.0.0.1:8080instead of just8080.
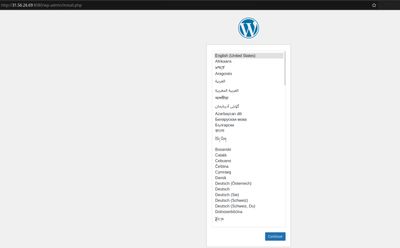
You will instantly hit the famous WordPress installation screen!
Step 5: Manage Your Environment
Here are the crucial commands to memorize when operating in the directory containing your docker-compose.yml file:
See what's actively running in this project:

docker compose ps
Check the deeply detailed background system logs (useful if an app crashes to see why it died):
docker compose logs
# Add -f to follow the logs live in real-time
docker compose logs -f
Stop the containers temporarily without deleting them:
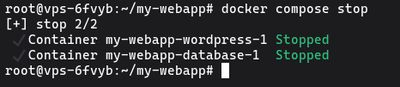
docker compose stop
(You can start them again using docker compose start)
Tear the entire project down (stops the containers, deletes them, and removes the internal network):
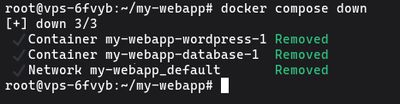
docker compose down
(By default, this does NOT delete your database volume, so your WordPress posts are completely safe upon re-deployment).
To deploy high-availability application stacks using containerized architecture, there is nothing like a high-performance backend infrastructure backing it. Spin up a Premium VPS, install Docker, copy in your YAML configs, and launch your complex, multi-layered infrastructures into production effortlessly.