When you install PHP directly from the default Ubuntu or Debian repositories via apt install php, you are locked into whatever single version of PHP shipped with the operating system on the day it was released.
If you upgrade an application like WordPress, Laravel, or Magento, it might suddenly require PHP 8.2 or 8.3. Conversely, if you are migrating a legacy application, it might aggressively crash on anything newer than PHP 7.4.
To solve this, you need the ability to install multiple versions of PHP simultaneously, run them side-by-side using PHP-FPM, and tell your web server exactly which version to use for which website.
Step 1: Add the Trusted PHP Repository
Because the default OS repositories only carry one static version of PHP, we need to add a trusted third-party repository.
For nearly a decade, the global standard for this has been maintained by Ondřej Surý, a highly respected Debian developer who manages the official PHP packages.
First, install the software properties package (if it isn't already there):

sudo apt update
sudo apt install software-properties-common ca-certificates lsb-release apt-transport-https -y
Now, add the repository:
For Ubuntu:

sudo add-apt-repository ppa:ondrej/php
sudo apt update
For Debian:
sudo curl -sSLo /usr/share/keyrings/deb.sury.org-php.gpg https://packages.sury.org/php/apt.gpg
sudo sh -c 'echo "deb [signed-by=/usr/share/keyrings/deb.sury.org-php.gpg] https://packages.sury.org/php/ $(lsb_release -sc) main" > /etc/apt/sources.list.d/php.list'
sudo apt update
Step 2: Install Multiple PHP Versions
With the repository added, you now have access to literally every version of PHP (from the ultra-legacy 5.6 to the cutting-edge 8.3 and beyond).
You can install multiple versions completely safely. They will not overwrite or conflict with each other.
Let's install PHP 8.3 (for a modern app) and PHP 8.1 (for an older app):

# Install PHP 8.3 and its FPM processor
sudo apt install php8.3 php8.3-fpm php8.3-mysql php8.3-xml php8.3-curl -y

# Install PHP 8.1 and its FPM processor
sudo apt install php8.1 php8.1-fpm php8.1-mysql php8.1-xml php8.1-curl -y
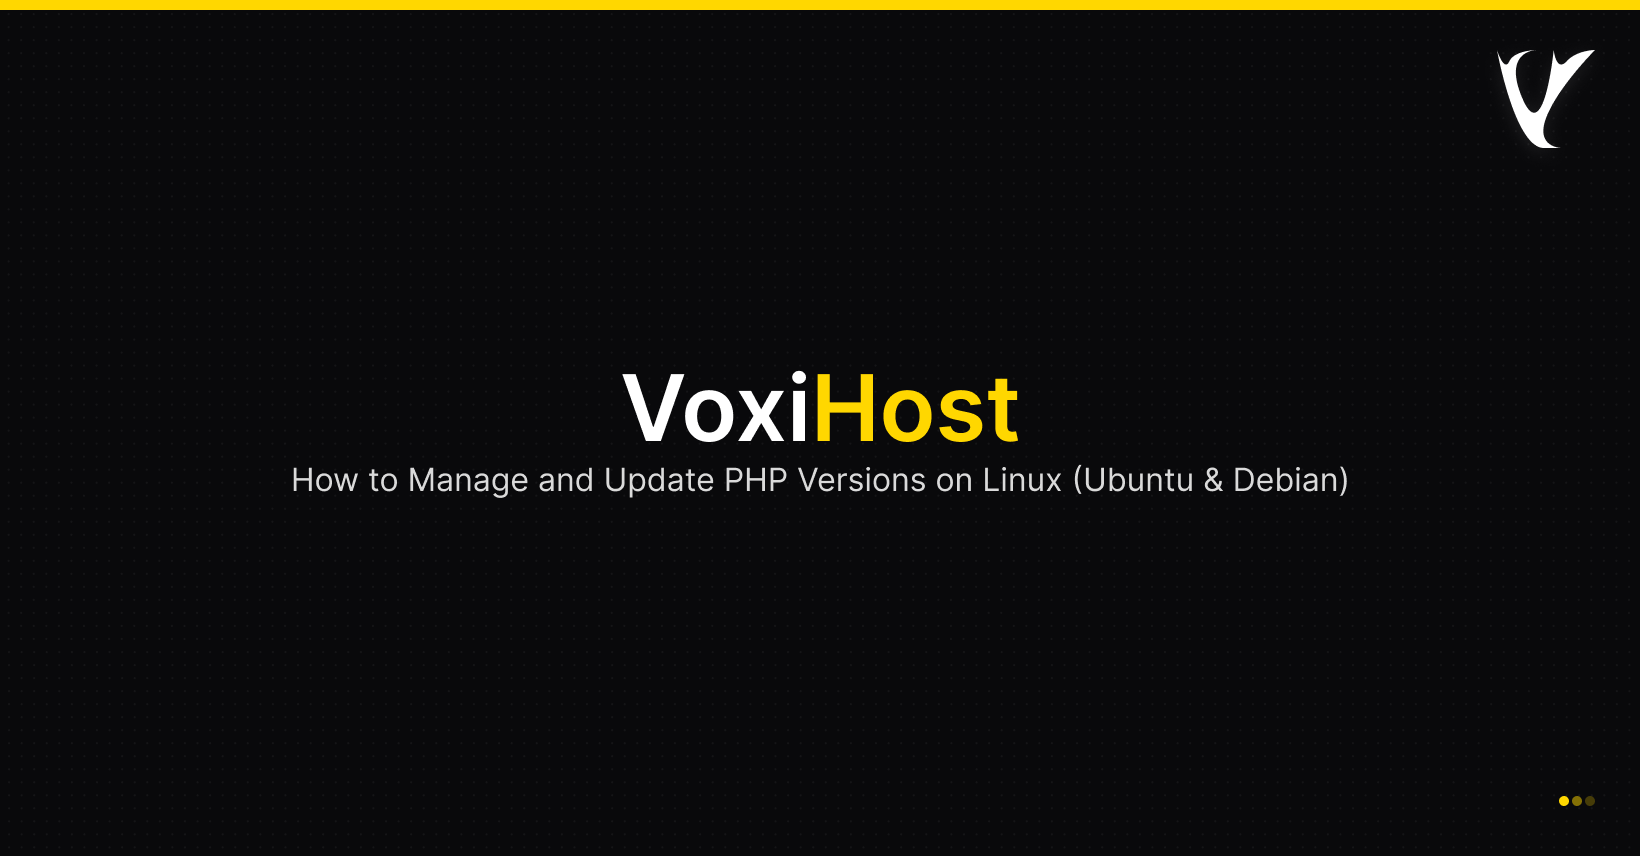
Once installed, both PHP-FPM services will automatically start running in the background independently. You can verify this by checking their status:
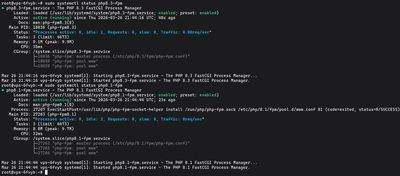
sudo systemctl status php8.3-fpm
sudo systemctl status php8.1-fpm
Step 3: Switch the Default Command Line (CLI) Version
If you type php -v in your terminal right now, it will output whichever version was installed last.

If you use terminal tools like composer or WP-CLI, you need to ensure the default command-line version of PHP matches your project.
To easily switch the default CLI version, Linux uses a tool called update-alternatives:
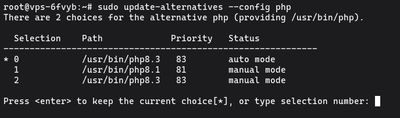
sudo update-alternatives --config php
You will see an output like this:
There are 2 choices for the alternative php (providing /usr/bin/php).

  Selection    Path             Priority   Status
------------------------------------------------------------
* 0            /usr/bin/php8.3   83        auto mode
  1            /usr/bin/php8.1   81        manual mode
  2            /usr/bin/php8.3   83        manual mode

Press <enter> to keep the current choice[*], or type selection number:
Simply type the Selection number you want (e.g., 1 for PHP 8.1) and press Enter. Verify the change by typing php -v again.
Step 4: Tell Your Web Server Which Version to Use
The CLI version has no effect on your web server. Nginx and Apache don't care what your default terminal PHP is; they only care about which FPM socket you explicitly point them to in their configuration files.
If you are using Nginx (LEMP Stack):
Open your Nginx Server Block (e.g., /etc/nginx/sites-available/default) to find the PHP location block. Change the fastcgi_pass line to point to the exact socket version you want to use for that specific website.
To use PHP 8.3:
location ~ \.php$ {
    include snippets/fastcgi-php.conf;
    fastcgi_pass unix:/var/run/php/php8.3-fpm.sock;
}
To use PHP 8.1 on a different Server Block, simply bind it to the 8.1 socket:
location ~ \.php$ {
    include snippets/fastcgi-php.conf;
    fastcgi_pass unix:/var/run/php/php8.1-fpm.sock;
}
Save the file and reload Nginx:
sudo systemctl reload nginx
If you are using Apache (LAMP Stack):
Apache handles FPM slightly differently via a2enconf.
First, disable the generic PHP module:
sudo a2dismod php*
Now, enable the specific PHP-FPM configuration you want to use globally:
# Enable the required modules if you haven't already
sudo a2enmod proxy_fcgi setenvif

# Enable PHP 8.3 FPM
sudo a2enconf php8.3-fpm

# OR completely switch to PHP 8.1 FPM
# sudo a2disconf php8.3-fpm
# sudo a2enconf php8.1-fpm
Restart Apache for the changes to take effect:
sudo systemctl restart apache2
Step 5: Editing the Right php.ini
When you need to increase your upload_max_filesize or memory_limit, you must edit the php.ini file that correlates exactly to the version and environment you are using.
For Nginx/Apache handling web traffic via PHP 8.3:
sudo nano /etc/php/8.3/fpm/php.ini
For the Command Line Interface (CLI) handling PHP 8.3:
sudo nano /etc/php/8.3/cli/php.ini
Anytime you edit the fpm/php.ini file, you must restart that specific FPM service for the new memory limits to apply:
sudo systemctl restart php8.3-fpm
Hosting multiple applications with wildly different legacy and modern PHP requirements requires a server with the RAM and CPU to handle the distinct FPM daemon pools smoothly. Grab a massively reliable Premium VPS, install as many PHP versions as your clients require, and run them concurrently without breaking a sweat.