Docker revolutionized server deployments by enabling applications to be isolated into lightweight, portable, self-contained units called containers. No matter what your underlying operating system is, a Docker container spins up exactly the same way.
However, many default repositories (like those built into RHEL, AlmaLinux, CentOS, and Rocky Linux) often point to Podman instead of Docker, or they host severely outdated versions of the Docker Engine. To guarantee you have access to the latest security features and the integrated docker-compose-plugin, you need to pull it directly from Docker's official source.
Step 1: Remove Old Versions
Before you install the official engine, you need to verify no older, conflicting packages are lingering on the system (even if you never installed them yourself). These packages usually orbit the names docker or docker-engine.
Run this command to clear the slate smoothly:
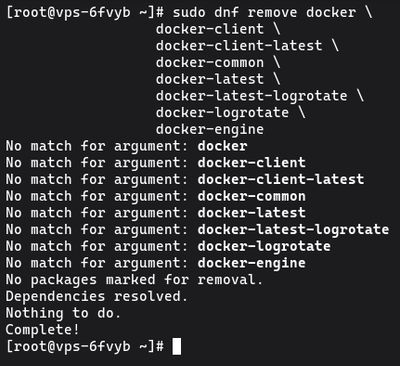
sudo dnf remove docker \
                  docker-client \
                  docker-client-latest \
                  docker-common \
                  docker-latest \
                  docker-latest-logrotate \
                  docker-logrotate \
                  docker-engine
It is perfectly fine if dnf reports that none of these packages are installed.
Step 2: Set up the Docker Repository
You need to tell your package manager (dnf) exactly where to find the official Docker releases. Docker provides a convenient configuration tool natively supported by RHEL systems via the yum-utils package.
Install the utilities:

sudo dnf install -y yum-utils
Now, use the yum-config-manager to safely add the official Docker repository to your system sources:

sudo yum-config-manager --add-repo https://download.docker.com/linux/centos/docker-ce.repo
(Even if you are on AlmaLinux, Rocky Linux, or Fedora, passing the /centos/ path is correct, as they share the absolute exact same binary architecture for Enterprise Linux).
Step 3: Install Docker Engine
With the repository securely added, your system knows where to look. You can now install the entire Docker suite.
This command installs the core engine (docker-ce), the command-line interface (docker-ce-cli), the container runtime (containerd.io), and modern plugins like Docker Compose V2 (docker-compose-plugin).

sudo dnf install docker-ce docker-ce-cli containerd.io docker-buildx-plugin docker-compose-plugin -y
Step 4: Start and Enable Docker
Unlike Ubuntu, which automatically starts services immediately after downloading them, RHEL-family distributions prefer you to intentionally start them.
You need to start the Docker daemon and enable it so it safely wakes up every time the server reboots. You can do both in one single systemctl command:

sudo systemctl enable --now docker
To confirm the service is alive, check the status:
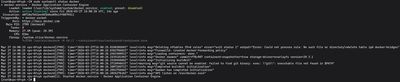
sudo systemctl status docker
Look for the bright green "active (running)" text.
Step 5: Verify the Installation
To prove unequivocally that Docker can successfully pull images from the internet and spin them up into operating containers, use the standard test payload:
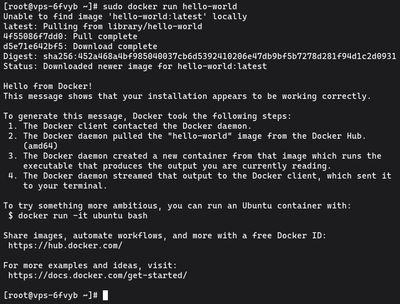
sudo docker run hello-world
If your configuration is correct, a container will be downloaded, run its code, and output a large confirmation block beginning with:
"Hello from Docker! This message shows that your installation appears to be working correctly."
[!NOTE]
Docker and your Firewall: Docker manages its own network rules directly throughiptables. While RedHat systems usefirewalld, which is generally more integrated with Docker than UFW, it's still best practice to be careful when exposing ports via the-por--publishflag. Always verify your open ports withsudo firewall-cmd --list-all.
Step 6 (Optional): Run Docker Without Sudo
You probably noticed you had to type sudo to run the test script. By default, the Docker daemon binds to a Unix socket instead of a TCP port, and that socket is owned by the root user.
If you created your own user account (as outlined in our User Management Guide), typing sudo hundreds of times a day can be tedious. You can grant your user native Docker rights by adding them to the docker group.
sudo usermod -aG docker $USER
Warning: The docker group grants privileges that are functionally equivalent to root access. Only add heavily trusted users to this group.
To force the system to acknowledge your new group standing without having to log out entirely:
su - $USER
Now, re-run the test without the sudo prefix:
docker run hello-world
If it works, congratulations! Your VPS is fully equipped to deploy the infinite number of pre-packaged container apps available on Docker Hub natively and securely.
For a reliable environment supporting rapid project prototyping with Docker, checkout our high-performance line of affordable Budget VPS environments today.