If you followed our guide on securing Ubuntu, you probably learned about UFW. But on the Red Hat side of the Linux world, AlmaLinux, CentOS Stream, Rocky Linux, and Fedora, the default, officially supported firewall manager is firewalld.
While UFW assumes your server just has one simple connection to the internet, firewalld uses a concept called "Zones". This allows you to have completely different rules for your public internet connection vs. your private local network connecting your database servers.
For a standard web server or VPS, though, it's just as easy to set up. Here is everything you need to know to lock down your system.
Step 1: Start and Enable firewalld
On most RHEL-family distributions, firewalld is installed by default but might not be running.
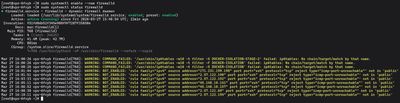
sudo systemctl enable --now firewalld
sudo systemctl status firewalld
If the status is "active (running)", you're good. If it's not installed, you can get it through the dnf package manager:
sudo dnf install firewalld -y
sudo systemctl enable --now firewalld
Step 2: Understanding "Zones"
firewalld organizes rules into "zones" based on the trust level of the network interface. For a VPS attached directly to the public internet, all your traffic usually comes through the public zone.
Find out which zone your main network interface is in:
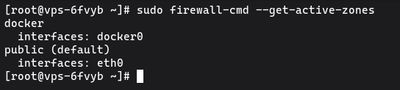
sudo firewall-cmd --get-active-zones
You'll see output like this:
public
  interfaces: eth0
This confirms your active internet connection (eth0) uses the public zone. Unless you specify otherwise, all commands you run will apply to this default zone.
Step 3: Check Your Current Rules
Before blindly adding rules, see what is already open:
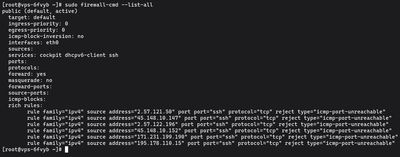
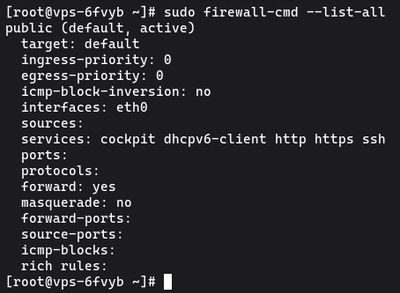
sudo firewall-cmd --list-all
RHEL distros generally ship with ssh and dhcpv6-client enabled out of the box so you don't accidentally lock yourself out immediately. A "deny all incoming" rule is implicitly applied to anything not on this list.
Step 4: Allow Services and Ports
The cleanest way to use firewalld is by allowing predefined services. A "service" in firewalld is simply a labeled rule for one or more ports.
For example, to open your server up to HTTP and HTTPS web traffic:

sudo firewall-cmd --permanent --add-service=http
sudo firewall-cmd --permanent --add-service=https
The --permanent flag is extremely important. If you omit it, the rule applies instantly but disappears the next time the server reboots. By adding --permanent, the rule gets written to disk, ensuring it survives a system reboot.
Opening Specific Ports
If you're running a custom application, say, a Node.js app on port 3000, use the port format instead:
sudo firewall-cmd --permanent --add-port=3000/tcp
Deleting Rules
Added something by accident? The reverse command is identical, just swap "add" for "remove":
sudo firewall-cmd --permanent --remove-port=3000/tcp
Step 5: Reload and Verify
Because you used the --permanent flag in Step 4, none of your new rules are actively running yet. They only exist on the disk. To push the saved rules into the active firewall state, you must reload:

sudo firewall-cmd --reload
Finally, run --list-all again to verify your new policies are in place:
sudo firewall-cmd --list-all
You should see your newly added services and ports under the services: and ports: line.
Advanced: Allowing Specific IPs
What if you have a MySQL database on port 3306, and you only want your application server (203.0.113.55) to access it, not the whole internet?
You can use a "Rich Rule" to tie a port to a specific source IP permanently:
sudo firewall-cmd --permanent --add-rich-rule='rule family="ipv4" source address="203.0.113.55" port protocol="tcp" port="3306" accept'
sudo firewall-cmd --reload
Wrapping Up
Once configured, firewalld runs quietly in the background securing the system. Since it natively integrates into the core of Fedora, Rocky, CentOS and AlmaLinux, it gracefully handles complex operations like bridging containers or routing internal networks natively. Coupled with fail2ban, your server is highly resistant to generic brute-force probing from internet bots.
To test your security skills on the live internet without risking any production payloads, checking out a temporary, low-tier Budget VPS is a cheap, reliable way to practice configuring an unbreachable RHEL system.